How To Make Your First Website Wireframe (with Examples)
Graphic (Design)
4 easy steps that will help you create a wireframe, and identify the goal of the website
This is the post for creating a successful website wireframe
So if you want to:
Build your website from scratch Improve the quality of your content and amaze visitors with your design
Then you’ll love this new guide.
Let’s get started.
The series
In the first episode of this series, we went through the discovery process of my website.
The Discovery Phase of the Web Design Process
In this article, we will move forward and start wireframing the concept we discovered.
What is website design?
The difference between a good designer and a great designer is that a great one can think about the problem.
Before interfaces, UI, logos, etc
See who is the owner and the audience
The first thing is to find what value this project must hold.
What is the common interest between the owner of the website and the visitors?
After understanding what are the website’s keys features we start with the wireframes.

What is Wireframing?
We can do wireframing in 2 ways.
Using online wireframe tools and in the old fashion style with a piece of paper and a pencil
The wireframe’s goal is to give the designer a good direction.
It needs to show the experience the visitor will have when landing on the web page.
We need to take many factors into consideration.
- The content
- the UI
- the visual design
We need to be able to build and assemble those 3 elements together.

What to wireframe?
The first thing to keep in mind is what features we are adding.
The list of these features came from the discovery phases.
At the moment I am currently rewriting my own website.
I’ve had my website for almost a decade now and it had different purposes over the years.
From being a portfolio for landing freelance clients, to working as a CV
My website let me get a junior PHP developer position.
At the moment I’m not looking for another job neither I want clients.
Another consistent function of my website was to be a place in which I share what I know.
The concept I learned about programming and web technologies.
The main functionality on the next iteration of my website will be exactly that.
It would be more focused on the blog section.
Other secondary purposes will be a Q&A section.
In there I am planning to share quick snippets of code or comments from the main articles.
Also, a form for new visitors to register for the newsletter.
Another feature would be a portfolio page.
in there I will share my previous project.
This was the most important thing I wanted to highlight the last time I did this process on my website.
I downgraded this feature given is not as important anymore
Also, every website should have a contact page.
If people want to follow up with me they should be able to contact me.

How to wireframe?
I prefer the old way.
So…
Let’s get pen and paper out!
Time to start wireframing.
1st step: Keep the features in mind
The first thing we have to do is to be sure we never forget want is the end goal of what we are doing is.
We can do this by writing all the features we need to add on a side of the page that must always be in-sigh.
2nd step: Mobile first
How to actually create the wireframe?
It is very simple!
Design a little rectangle living the bottom side open.
This will guarantee full space if the website gets longer.
Then we start creating the wireframe following the mobile-first approach.
For now, we want to insert as fewer data as possible inside the rectangle.
Focus on what is very important and must be on the page.
We can add all the nitty gritty later.
don’t forget,
SPEED in the name of the game.
A website that does not load fast is a website that no one will want to visit.
3rd step: Get the structure right
Every website has its own story and goal.
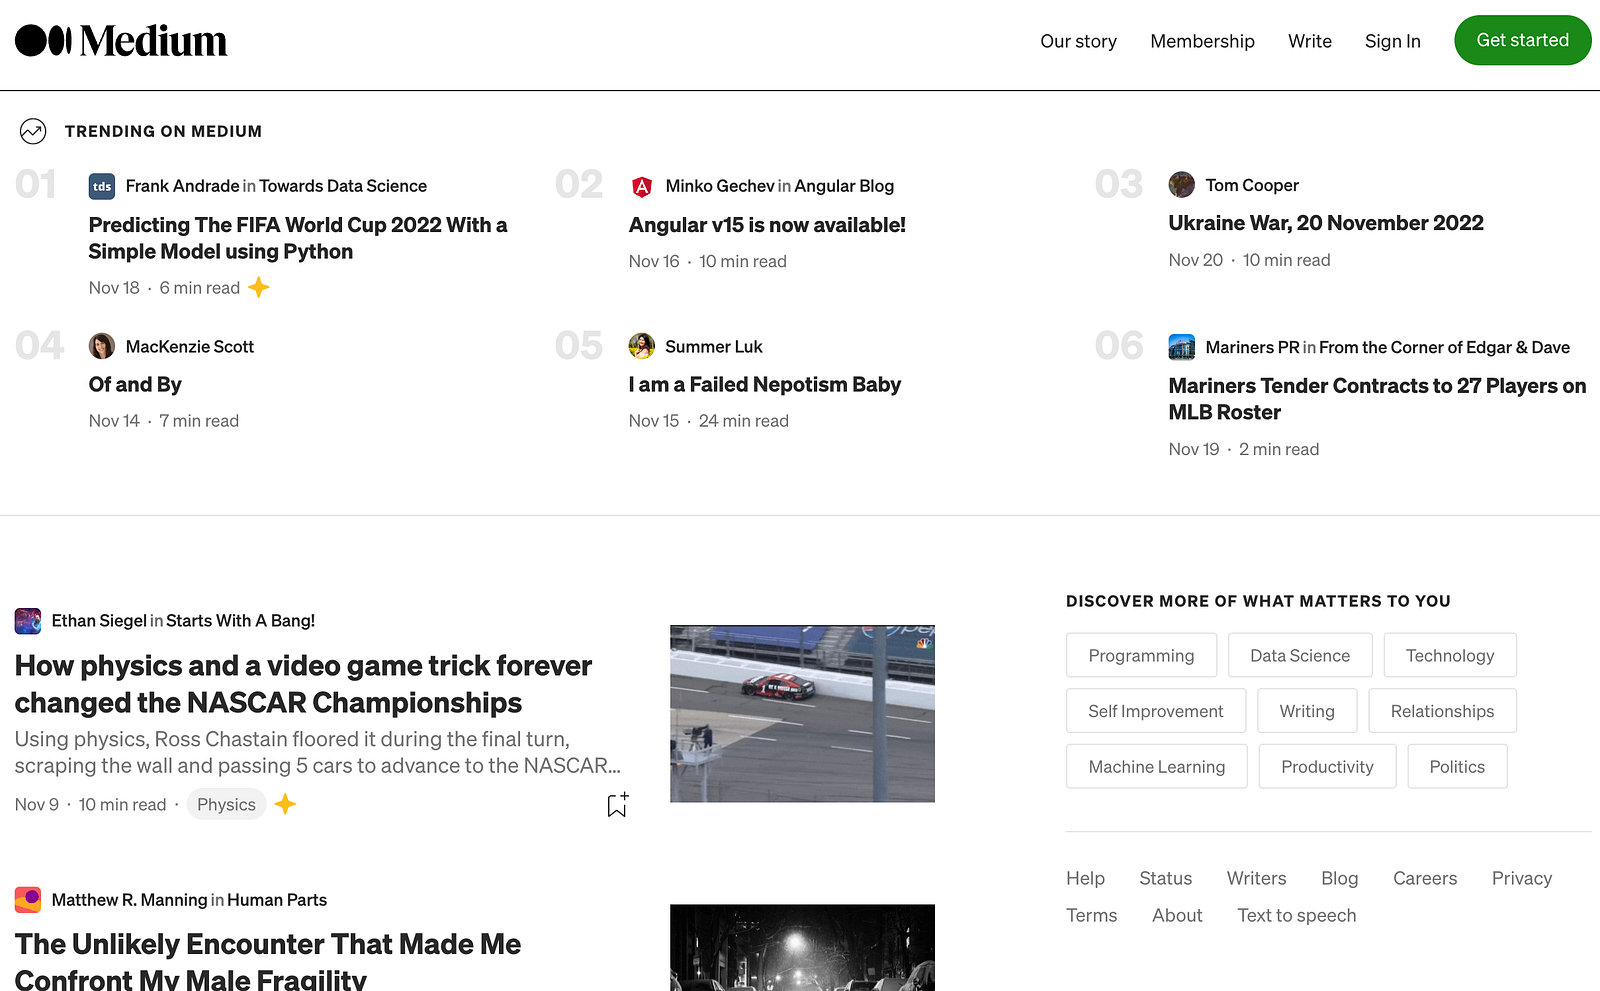
Medium.com wants users to read interesting articles.
For that reason, they show you as many stories, topics, and authors as possible on any page.
Youtube, instead, wants to keep you looking at videos.
They have a huge repository of videos and they show you the full list from the home page.
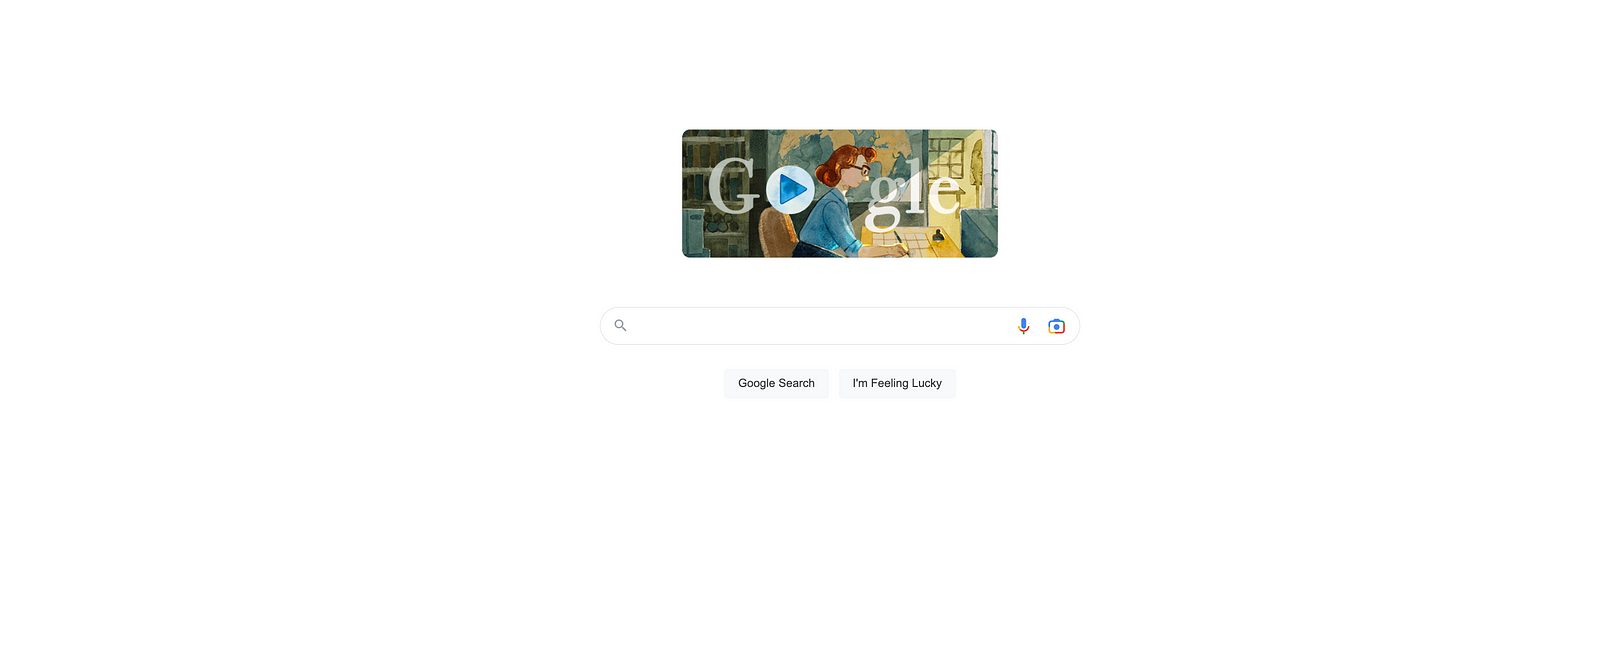
Google’s users want to find information.
In fact, google.com is pretty plain.
What you get are their logo and a text field.
Each of these websites has its own structures (plain or complex) and they serve their purposes.
A goal you must have during this phase is to find what is the best structure for your website.
Is it a directory in which you’ll need to show as much content as possible?
Or does your website only need a form as per a landing page?
Or you want to tell a story.
In this case, a timeline structure would be an amazing example of it!
At the moment we don’t have to do anything spectacular with our sketches.
Setting up the paper where things should be.
Sometimes I also like to imagine some behavior.
like, if the user clicks here then this box will move to the side etc.
Remember to keep this as simple as usual.
Less is more
4th step: Experiment
I know the structure that my website needs to have.
The most important aspect of my website would be the blog.
If a user land on my web pages is because he wants to learn something.
I want my visitors to learn as much as possible and to be able to navigate all the different types of content I produce.
This means I’d like my user to see as many blog posts as fast as possible.
A search bar inside the hero section might be useful.
Also, I should add a list of the most popular blog posts and their quick link.
I have also been in the web development and web design field for a decade.
I’d like to show proof of my work and a portfolio will be necessary.
Even if this is not as important anymore.
I need visitors to be able to contact me either by sending me an email or subscribing to my newsletter.
Should I put a big form with a lot of details?
Thinking again, a form is most filled when there are fewer fields in it.
As you can see, you need to focus on so many variables when you develop a website.
There are millions of different ways to put all these requirements and ideas into a layout.
The only way we can do this is by brainstorming and putting as many ideas out as possible.
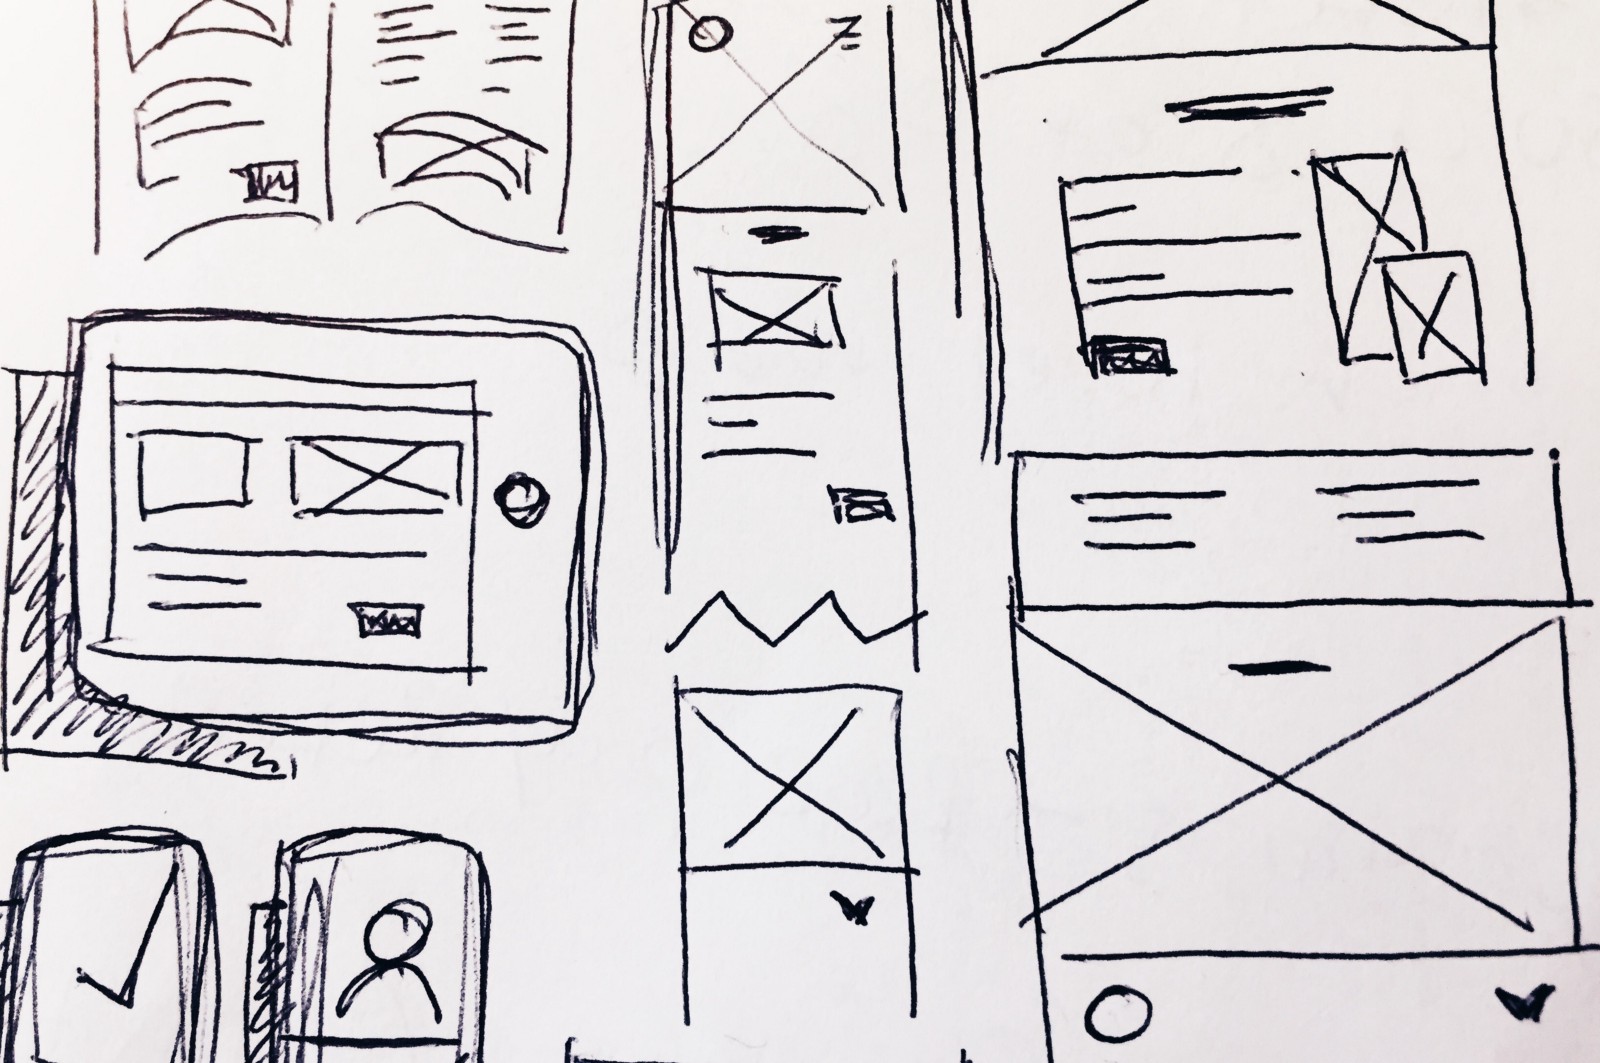
once ready the page should look something like the image above.
Ideas on paper
What to do next?
Wireframing is not that hard.
It matters to translate all your thought from the mind into a piece of paper.
The difficult part is to find the best structure for the content you need to put into your website.
Good news.
There is not a single best one,
In fact, there are hundreds of combinations of how and where we can lay down our content.
It is time to add some more details using design software.
That can be Photoshop, Adobe UX, or Figma.
Whatever you are more comfortable with.
In there we are adding colors, images, and a few patterns to the webpage.
But this will not be the finished product yet.
You will notice that even during the design I am not going to follow 100% of the structure of the wireframe.
Some ideas that seem good right now might now be as good once it gets into a more concrete form.
We are going to use this wireframe as a guide.
This is the beautiful thing about design
We never finish.
We can mold our project all the time, and find something to improve.
Experiment with something else, etc.
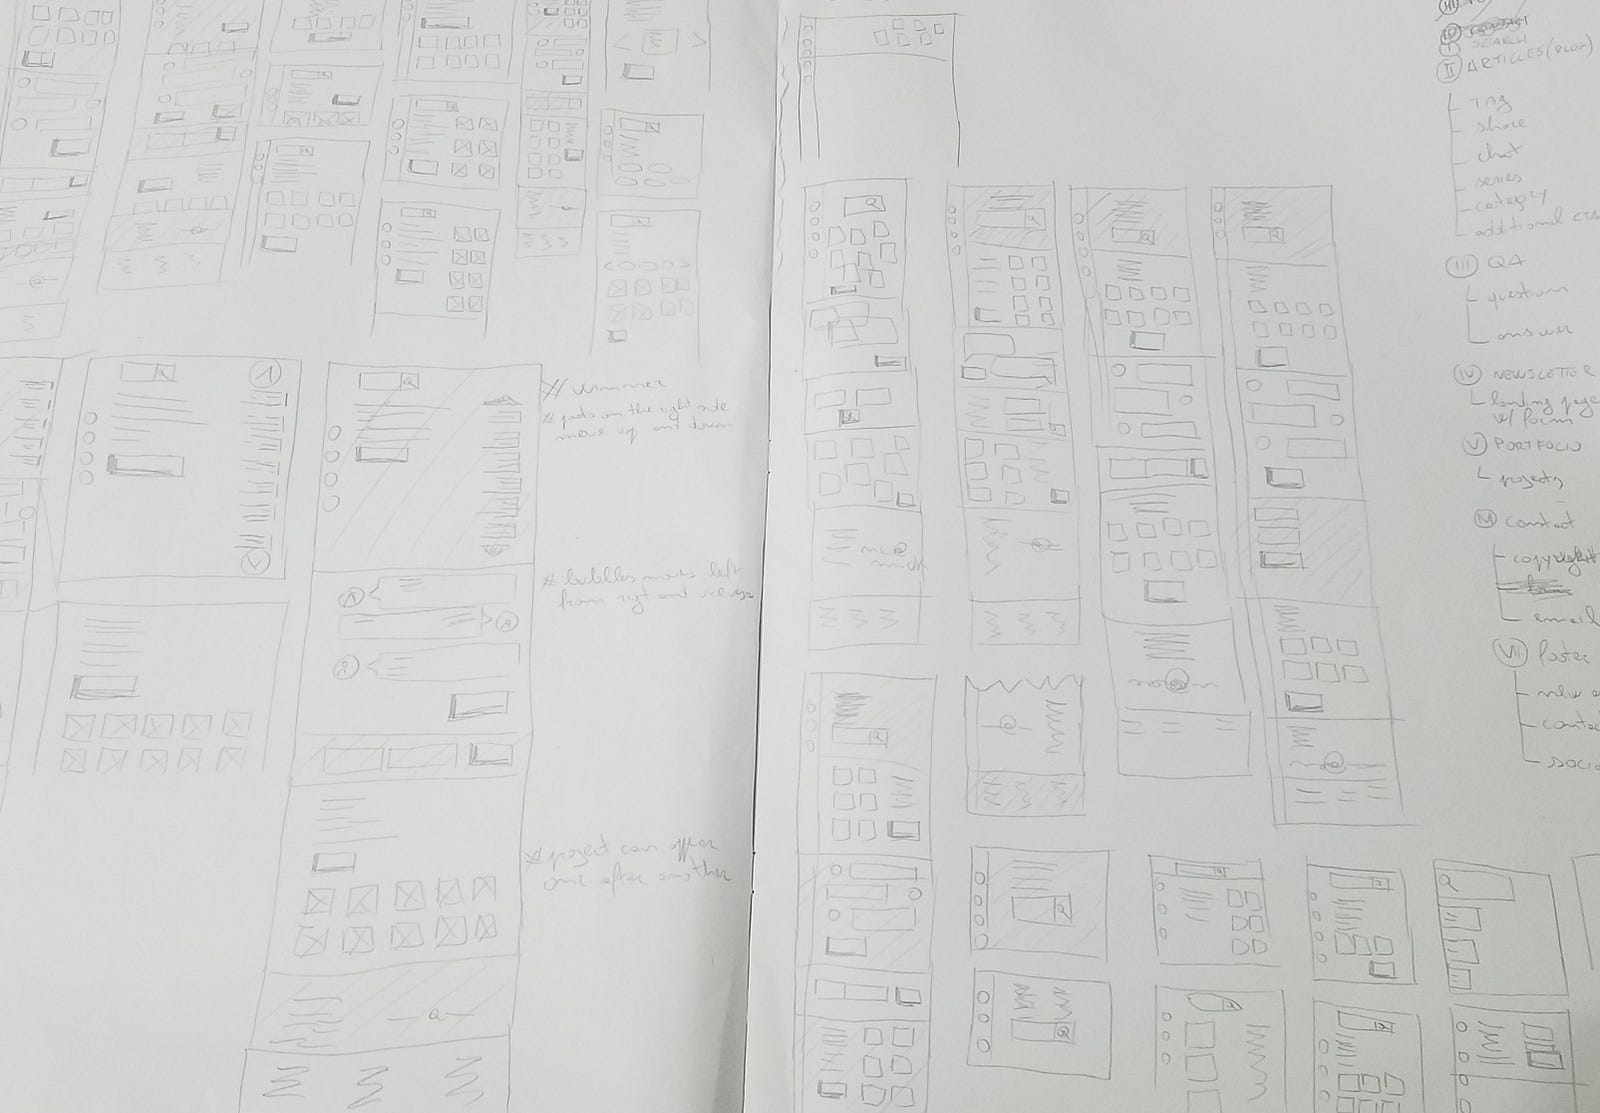
The photo above is my sketchbook after 25 minutes of experiments.
Quite messy I'd say.
Conclusion
Have you tried any of these steps yet?
How do you wireframe your websites?
We have seen the second very important step to creating a website.
To differ from popular thinking we are still far away from writing actual code.
But, as when creating a building.
There are many months of planning and testing before the first brick is in place.
If you are new here,
In this series, we are going to rewrite my website.
I am going to show you all the steps.
From the discovery phase to actually putting this website into production.
If you want to learn more, subscribe to my email to get notified every time I publish a new post.
Thanks for reading.